
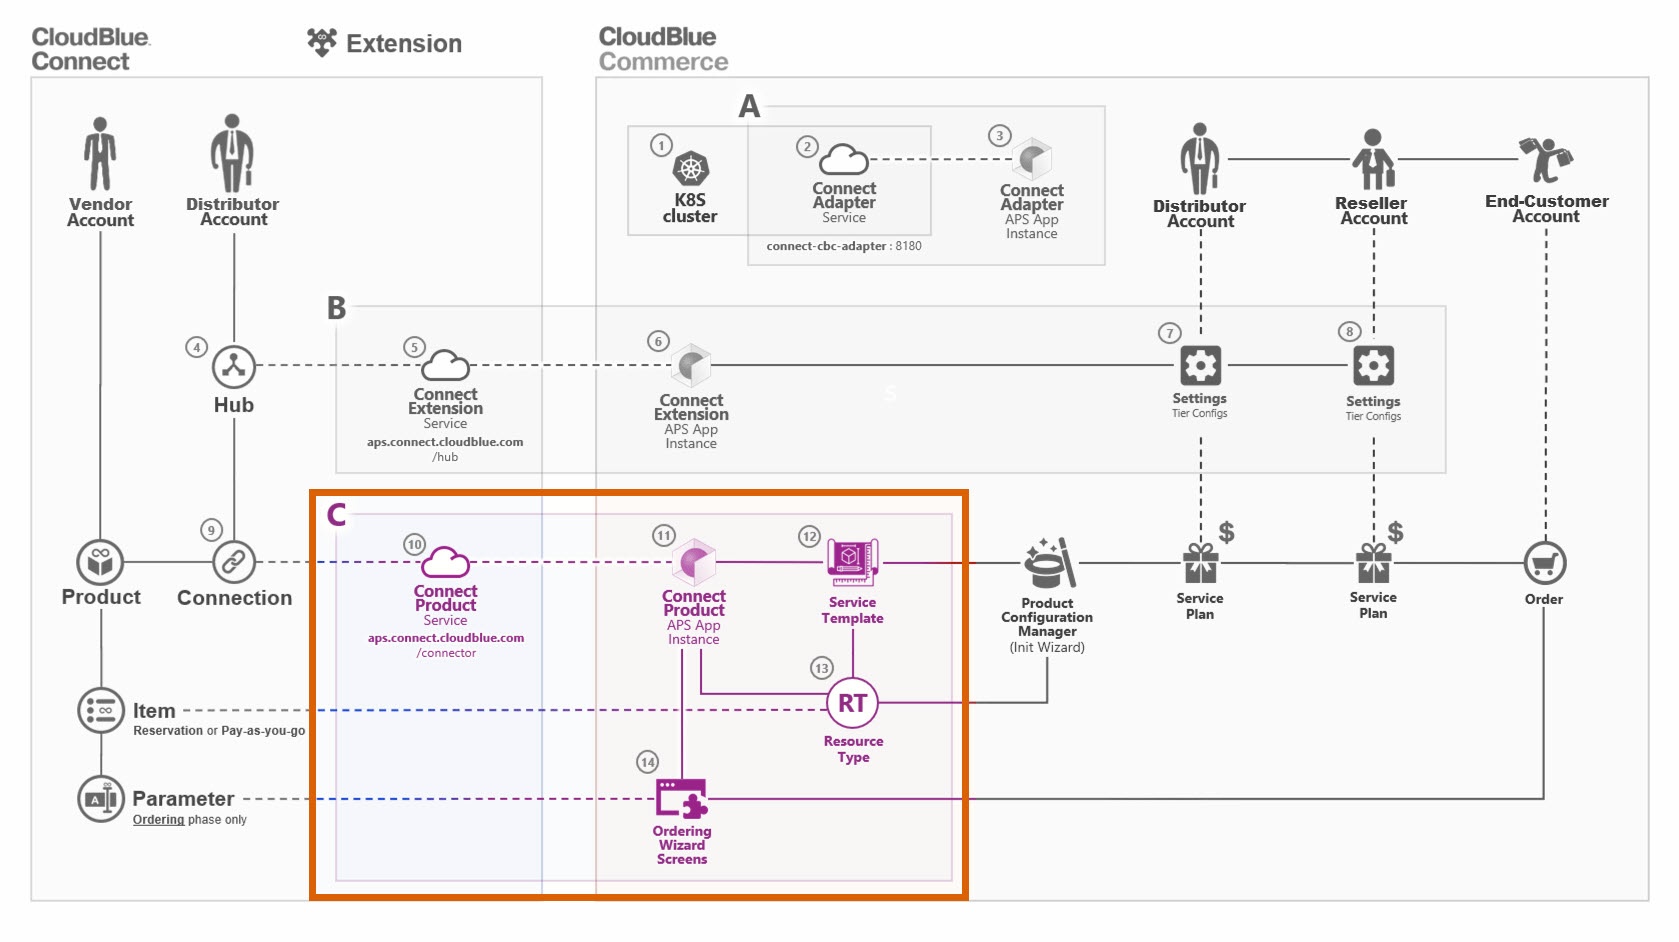
Product Package is a part of the CloudBlue Connect Extension for the CloudBlue Commerce that gets deployed to the system for each individual Product as schematically illustrated and highlighted below:
Lifecycle management of Product Packages is performed automatically using self-service user interface of the Extension Package. Thus users don’t need to install or update Product Packages manually.
In order to work with Product Packages, users first need to deploy Extension Package. Please refer to that articles for details on how to do that.
Follow these steps to perform installation of the new Product into the CloudBlue Commerce.
CloudBlue Connect stores product-specific configuration associated with the Hub in the special object called Connection. Before installing a Product into the Hub, it is required to create your connection object. Note that your Hub should have at least one associated marketplace to use it while creating Connections.
Navigate to the Products module from your Distributor Portal on Connect and locate a Product that you plan to install. Thereafter, access to the Connections section:

Click Create Connection and configure Environment and Hub settings to match your requirements:
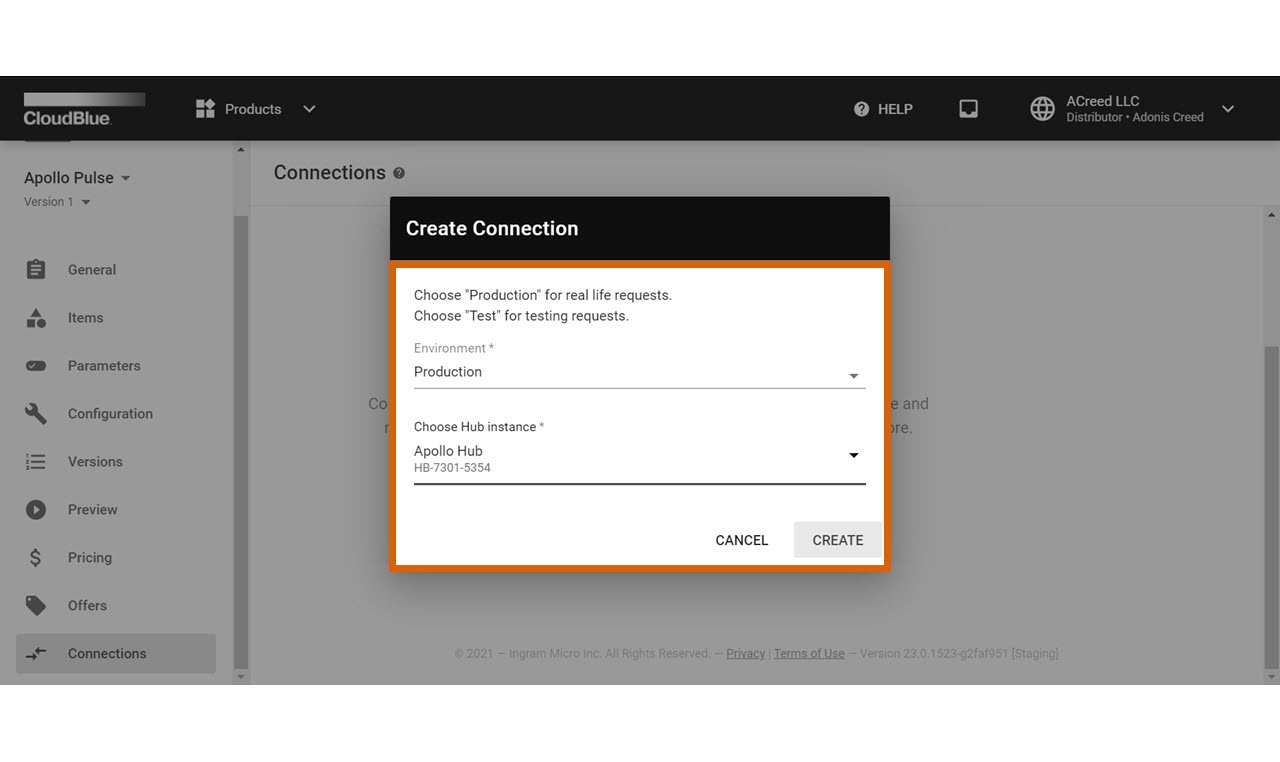
Click Create to finalize your connection object creation. Therefore, the system should display your created Connection:

Once Connection configuration is complete, proceed to the next step of product installation directly in the user interface of the Extension Package from the Provider Control Panel of the CloudBlue Commerce.
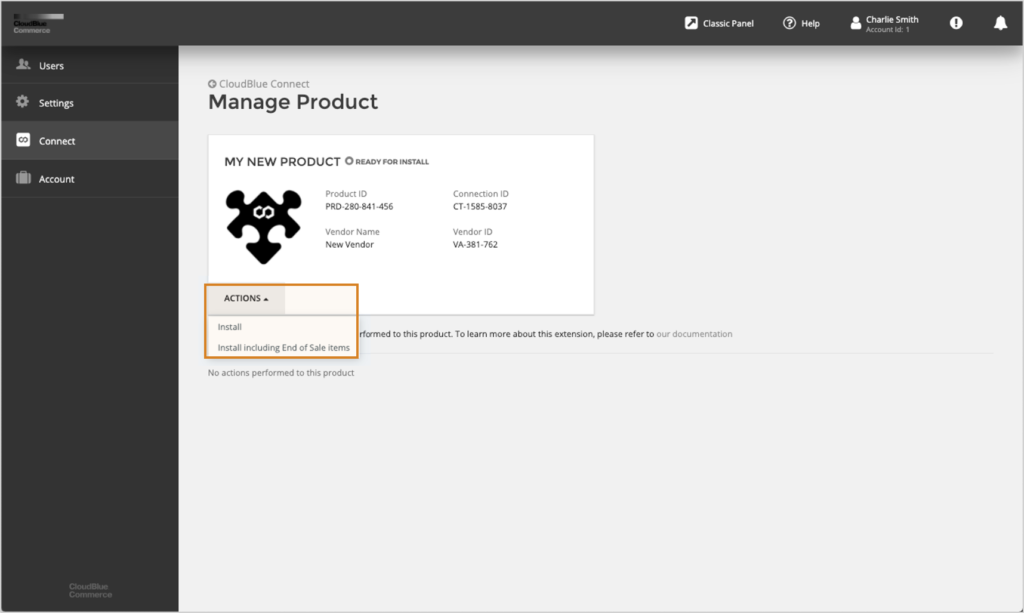
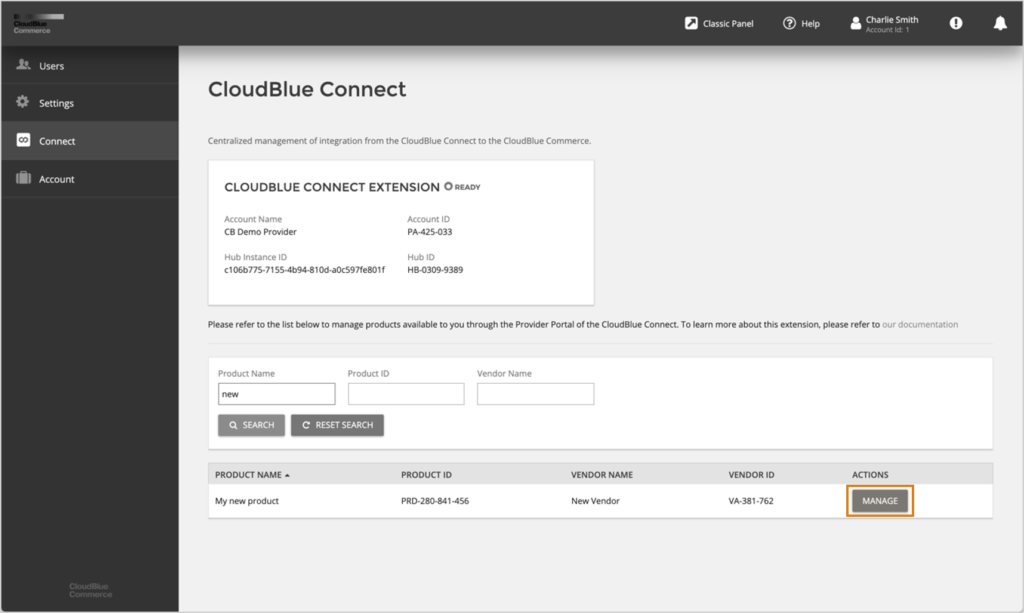
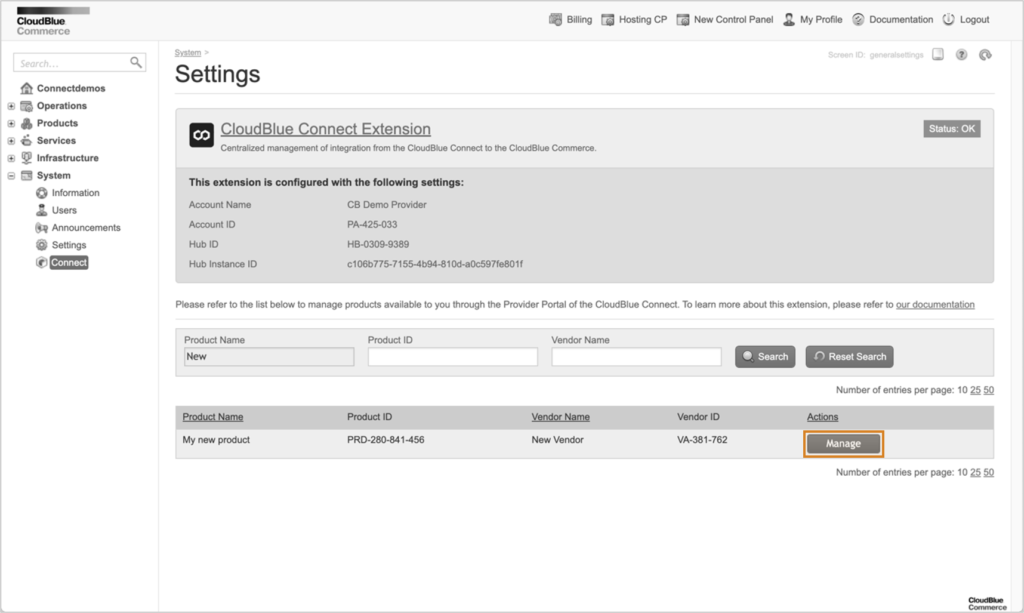
Installation of the Product Package must be performed from the “Connect” menu element of the Provider Control Panel versions 1 and 2. To do that, locate Product of Interest and click “Manage” as illustrated below:


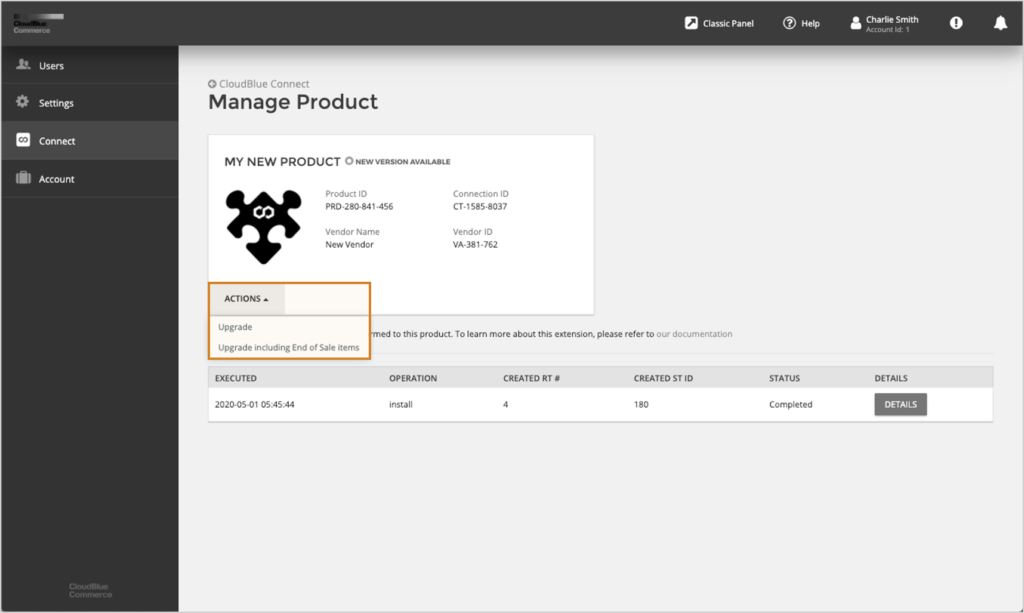
In the Product Details screen you will need to choose 2 possible installation scenarios:
Once you click Install, a new asynchronous Task will be created to handle the installation process and corresponding record will be shown in the user interface:
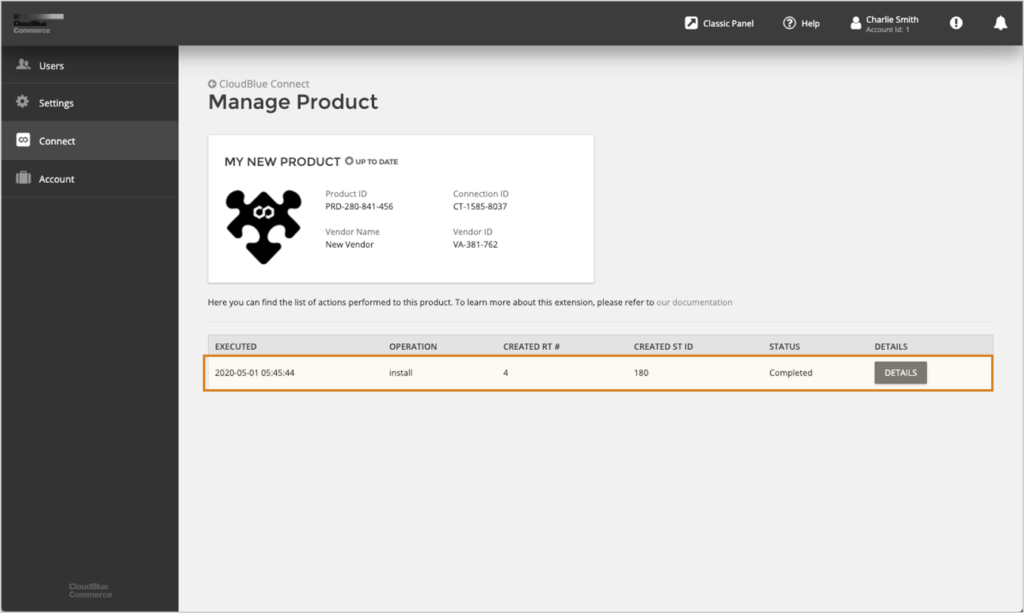
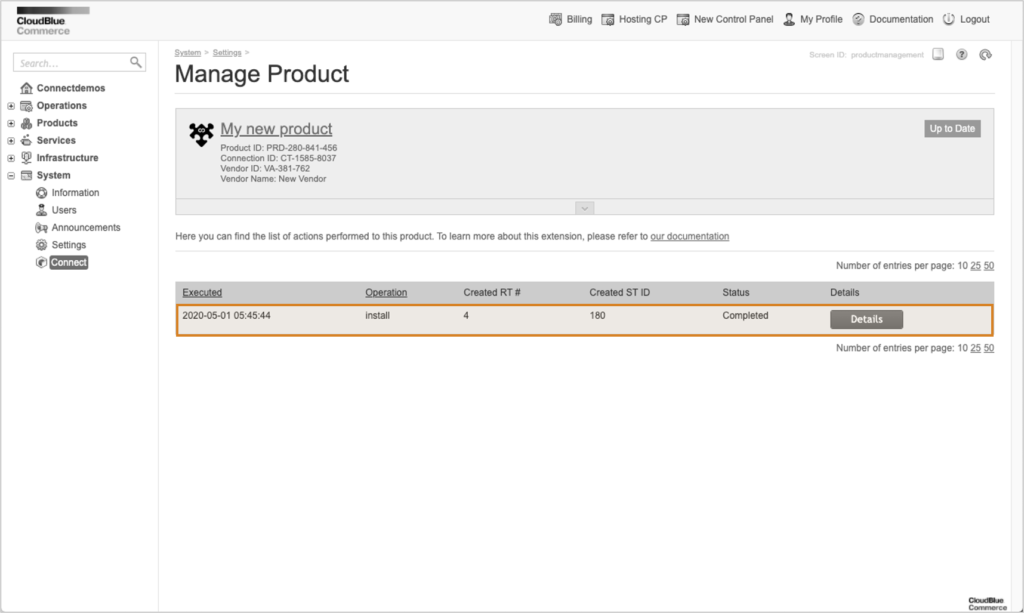
Each task transitions through the following workflow and might take up to 5 minutes to execute:

All Product APS Application Instances are integrated with the Product Configurations Manager (PCM) also known as Initialization wizard (or Init Wizard) that is required to finalize Product configuration in the system.
Once Product Package installation is complete, launch PCM using the “Configure Product” button in the Application Instance details screen of the Provider Control Panel v1 as illustrated below:
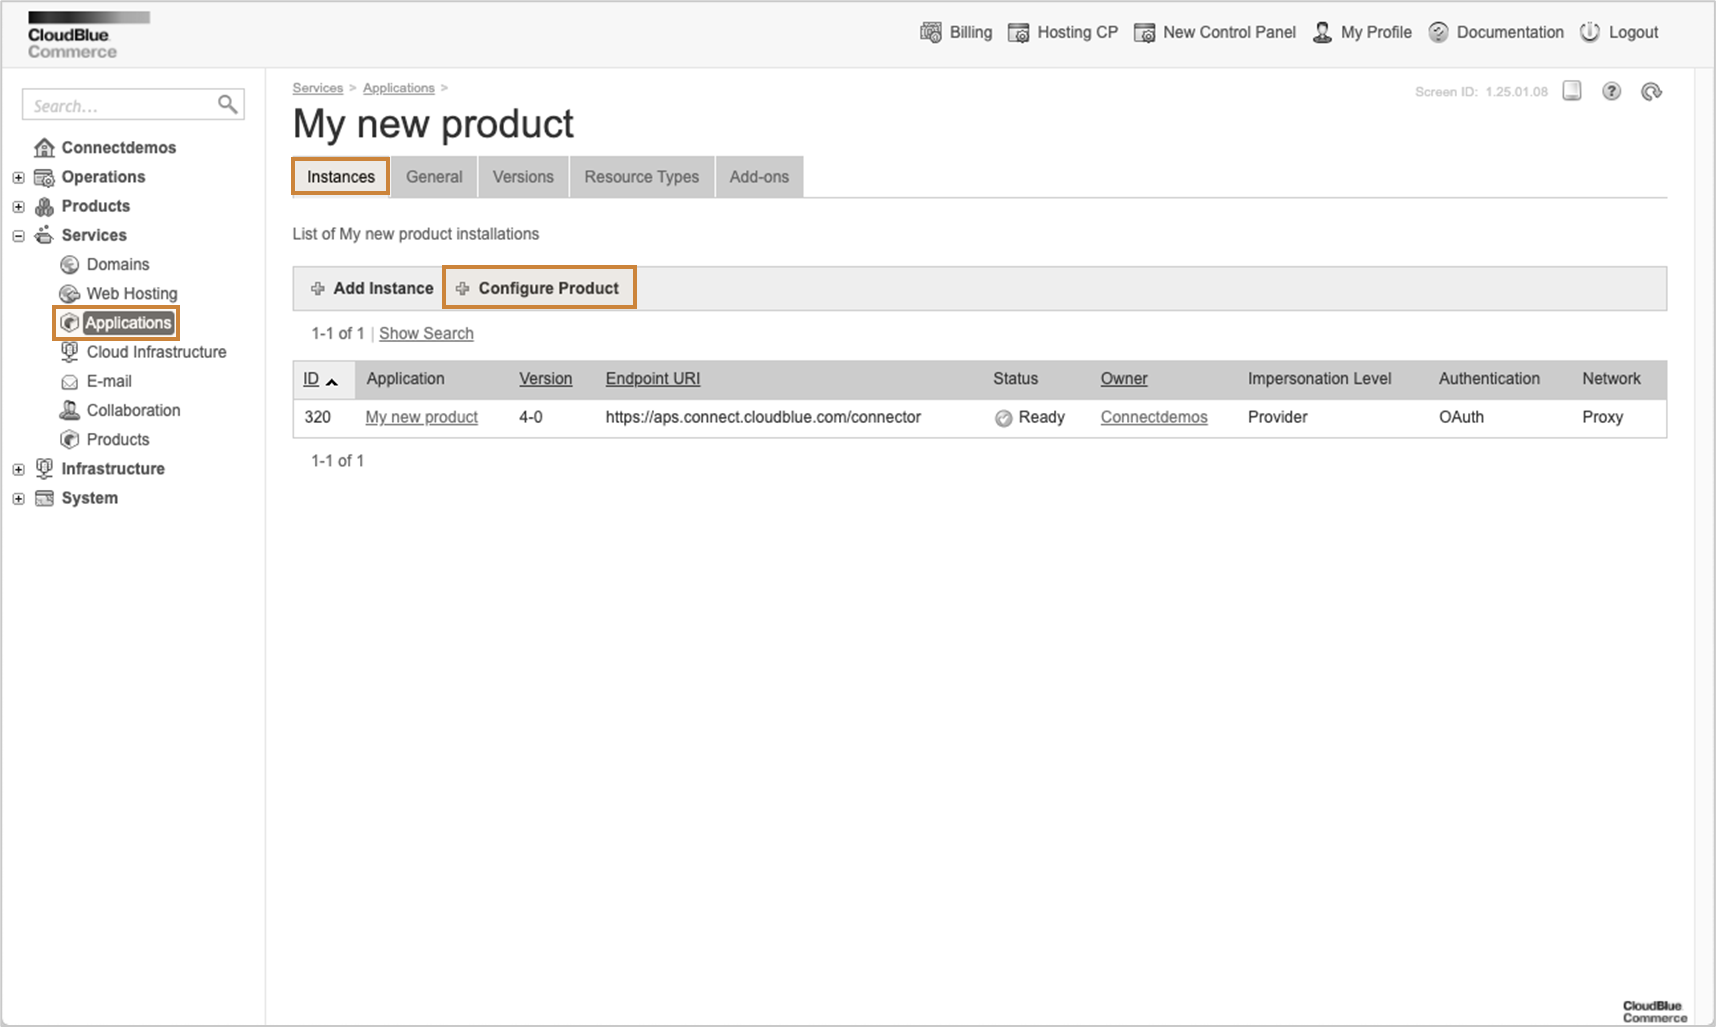
For details on the PCM, please refer to the following section of the CloudBlue Commerce documentation.
Follow these steps to perform installupgrade of the existing Product in the CloudBlue Commerce.
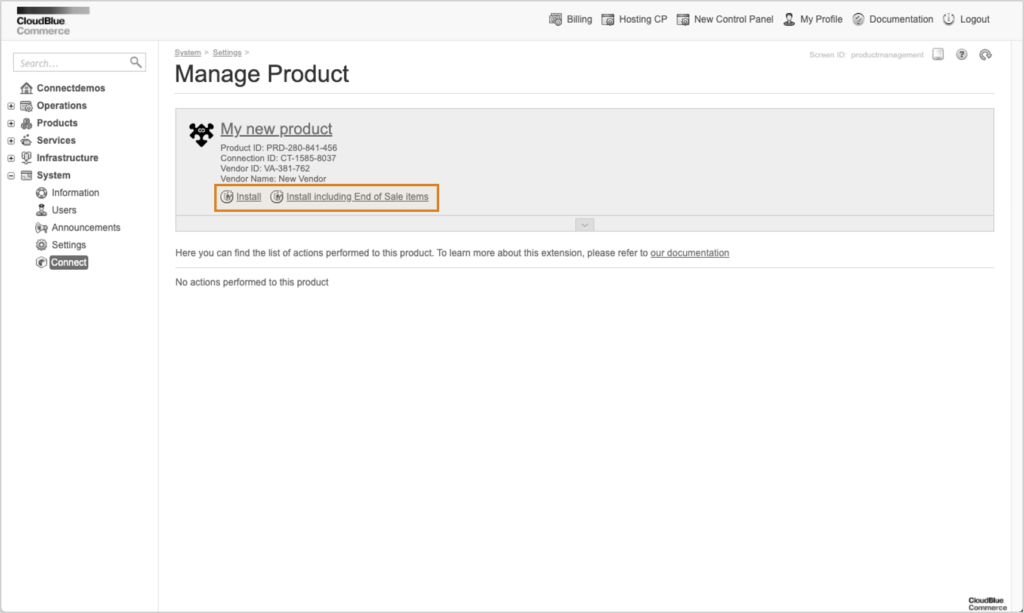
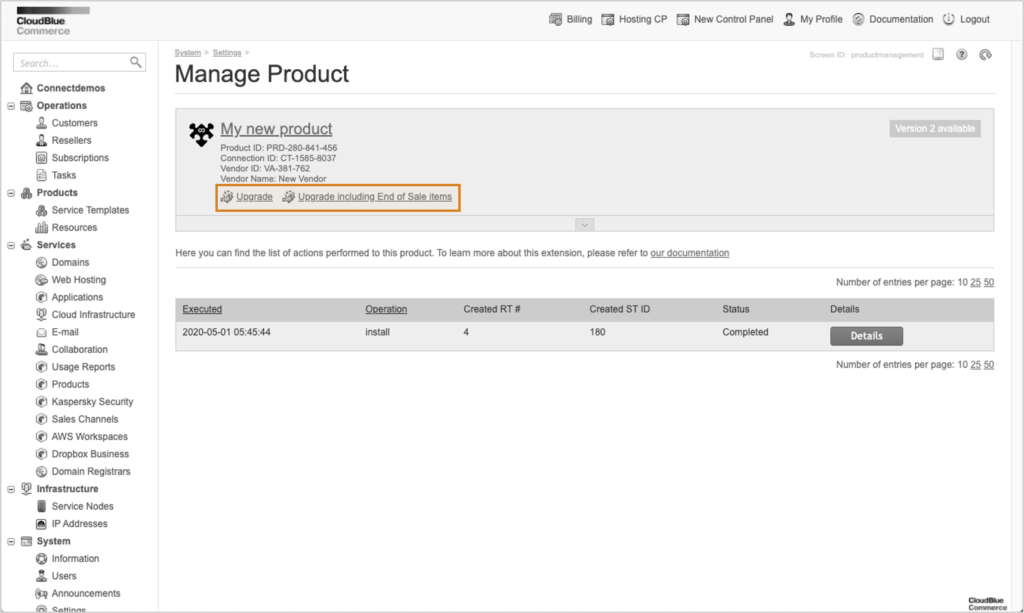
Upgrade of the Product Package must be performed from the “Connect” menu element of the Provider Control Panel versions 1 and 2. To do that, locate Product of Interest and click “Manage” as illustrated below:
In the Product Details screen you will need to choose 2 possible installation scenarios:
Once you click the Upgrade button, a new asynchronous Task will be created to handle the installation process and corresponding record will be shown in the user interface:
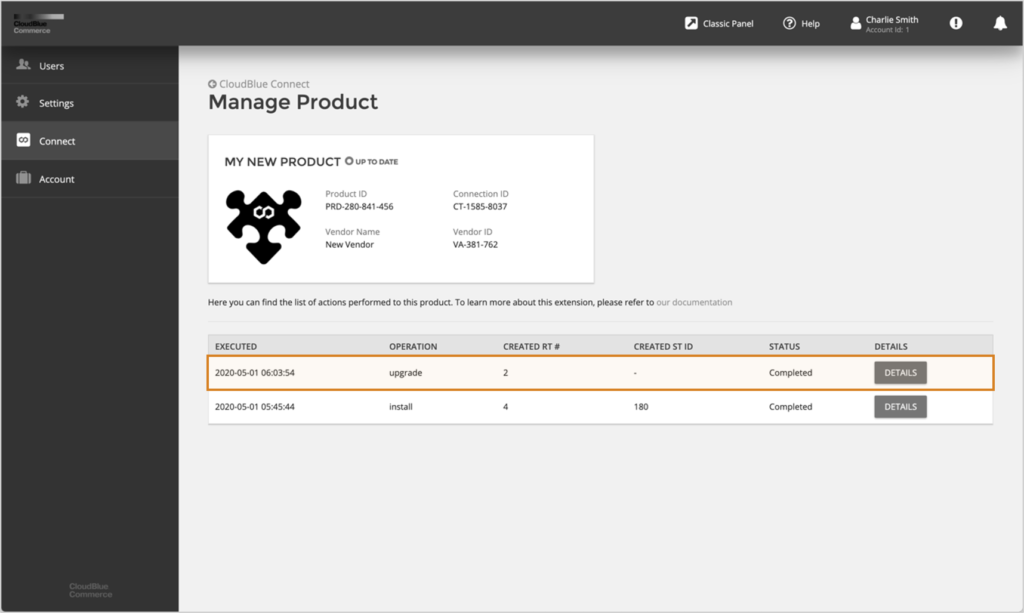

Each task transitions through the following workflow and might take up to 5 minutes to execute:

Please note that Resource Types created during upgrade are never automatically added to the Service Template to allow operators choose required business scenario while working with the Product Configurations Manager (PCM) to finalize products setup.
Once Product Package upgrade is complete, launch PCM using the “Configure Product” button in the Application Instance details screen of the Provider Control Panel v1 as illustrated below:
For more information on the PCM, please refer to the following section of the CloudBlue Commerce documentation.
 Additional content
  Contact us
