
Adapter is a part of the CloudBlue Connect Extension for the CloudBlue Commerce that is required to initialize Hub object in the CloudBlue Connect Provider Portal and establish internal API connectivity.
Adapter is highlighted in the overall Extension components diagram below:
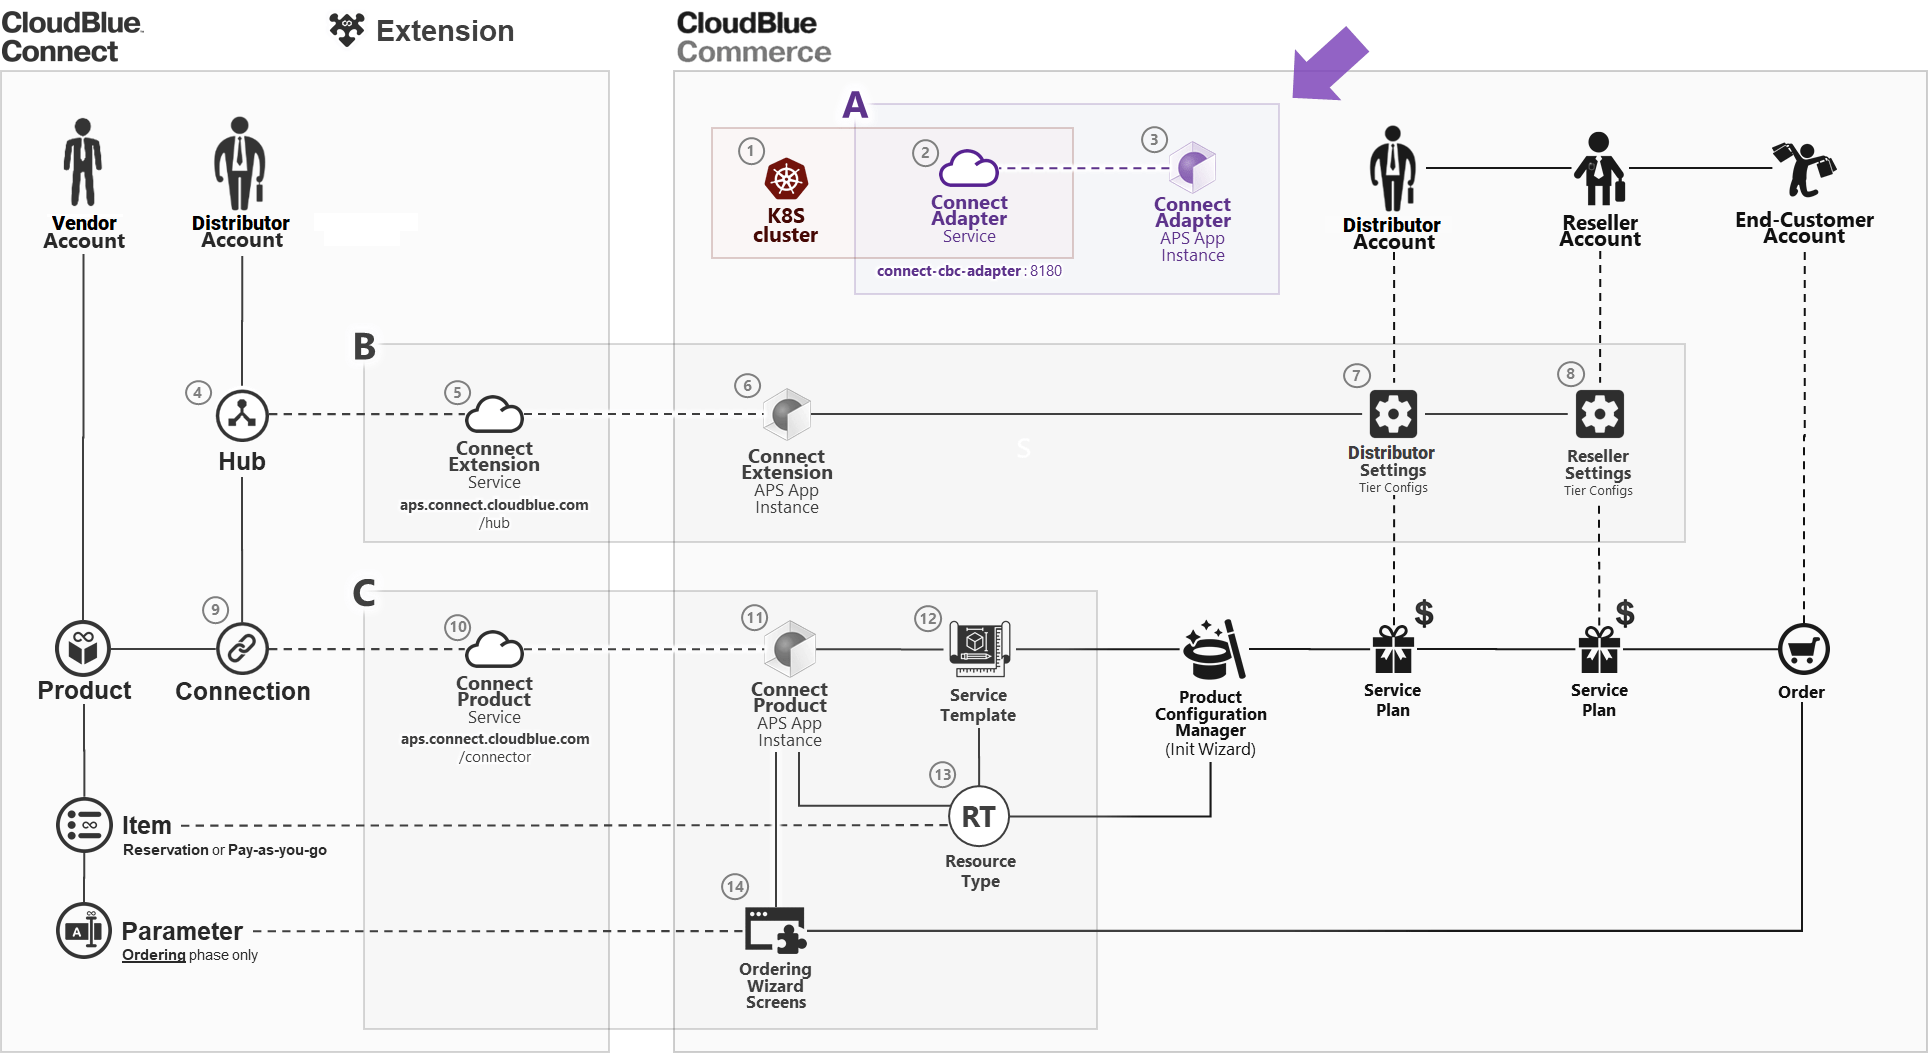
Adapter consists of the back-end (service) and front-end (package) components deployed independently as outlined in the following paragraphs.
Please refer to the following sections of this document for details on the deployment of the Adapter Package and related configuration.
Deployment of the Adapter Service requires Kubernetes (k8s) Cluster component of the CloudBlue Commerce for the deployment:
And instantiation of the Adapter APS Package requires Outbound and Outbound proxies configuration:
Please refer to the above mentioned articles for the details.
Please follow these steps to deploy Adapter Service back-end.
You will need the following file to deploy the Adapter Package Service into the Kubernetes Cluster:
This file describes desired state of a Deployment as described in the Kubernetes Concepts – Deployment.
Please download the file above and modify the following values to match your specific configuration:
You can use the Online Random Strings Generator to get 2 values for the OAUTH_KEY and OAUTH_SECRET respectively or use any other way to generate random values with the following constraints in mind:
Users can even enter random string manually as long as it conforms to the requirements above.
In order to execute the deployment instructions from the file using the kubectl utility, you need to upload the connect-adapter-deployment.yml file prepared in the previous step to some folder in your k8s cluster (e.g. /root).
Once file is uploaded to the cluster, access k8s node using SSH and execute the following command:
$ kubectl apply -f connect-adapter-deployment.ymlUsing the file uploaded in the previous step. See kubectl reference guide for more details.
Before going forward, please make sure that Container is up and running as it might take some time for it to become ready. The simplest way to check container status is by running the following command:
$ kubectl get podsSee technical details for more information related to the technical aspects of service operations.
Once Adapter Service is up and running, it is required to deploy Adapter Package into the CloudBlue Commerce following instructions below.
Open Provider Control Panel of the CloudBlue Commerce, navigate to the Services > Applications screen and click the Import Package button:

and, assuming service names were not modified during deployment, specify the following URL pointing to the Adapter Service running in the Kubernetes Cluster:
as illustrated in the following diagram:
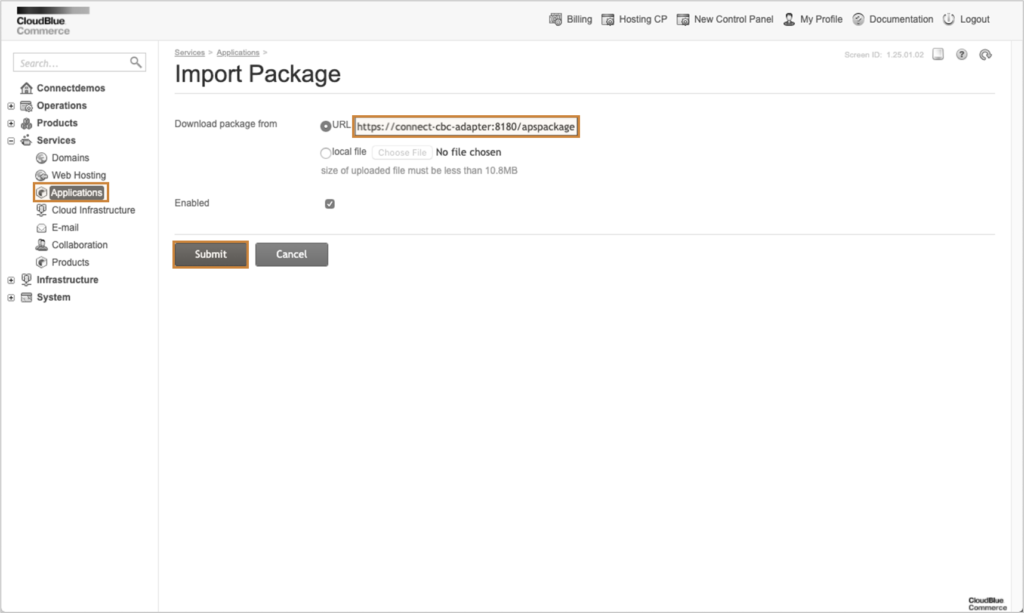
As a result of this operation, you should see the “Package successfully scheduled for import” notification. Please wait a few seconds.
In case the CloudBlue Commerce fails to import using the URL above, please download the APS package by using a link below and upload it using the “local file” option:
Upon completion of the importing process, you will be able to proceed to the next step of the configuration process and create APS Application Instance.
Once APS Package is imported, please navigate to the System Applications tab, locate the “CloudBlue Connect Adapter” package:

Once clicked at the package in the list, you will navigate to the APS Application Instances list:
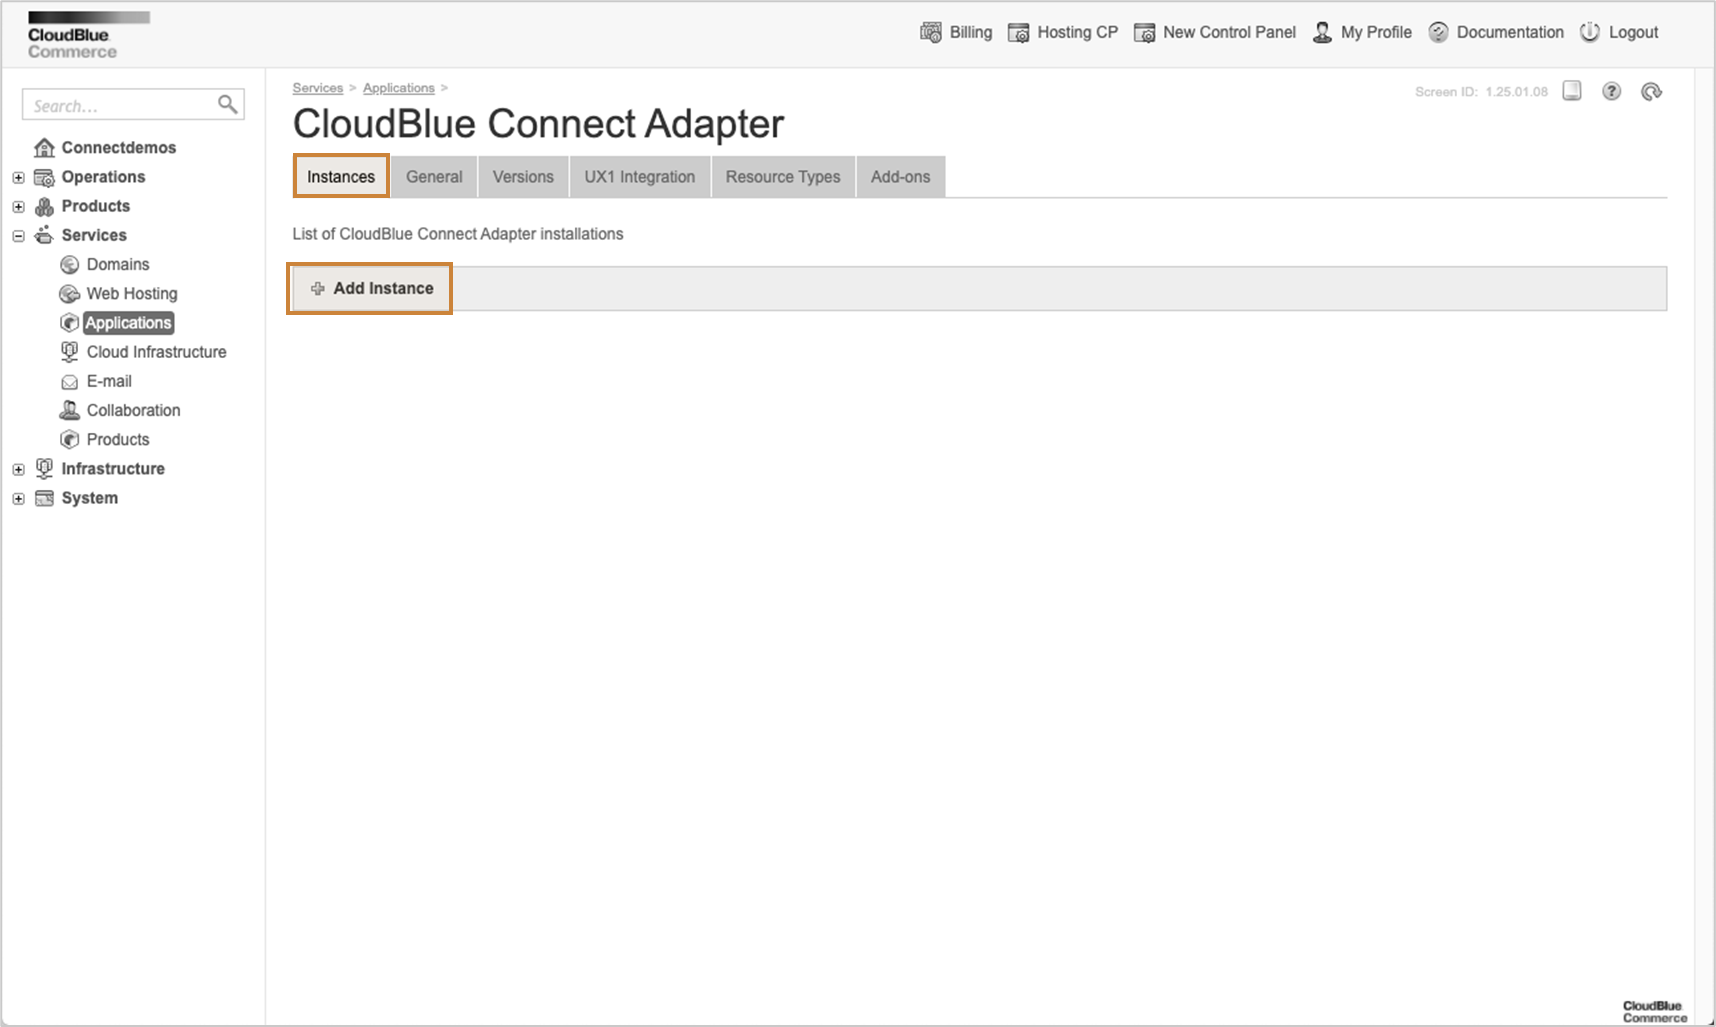
Click Add Instance to navigate to the Instance Creation screen:

Thereafter, provide the following values:
| Parameter | Value |
|---|---|
| Application API end-point URI | https://connect-cbc-adapter:8180 |
| Authentication Type | OAuth |
| Network Access | Backnet |
| OAuth Key | value written to the Deployment file’s OAUTH_KEY variable while deploying Adapter Service |
| OAuth Secret | value written to the Deployment file’s OAUTH_SECRET variable while deploying Adapter Service |
| Impersonation Level | Yes |
Click Next and create APS Application Instance.
If everything was done correctly, you should see your new instance with the status “Ready” in the System Applications list as illustrated below:
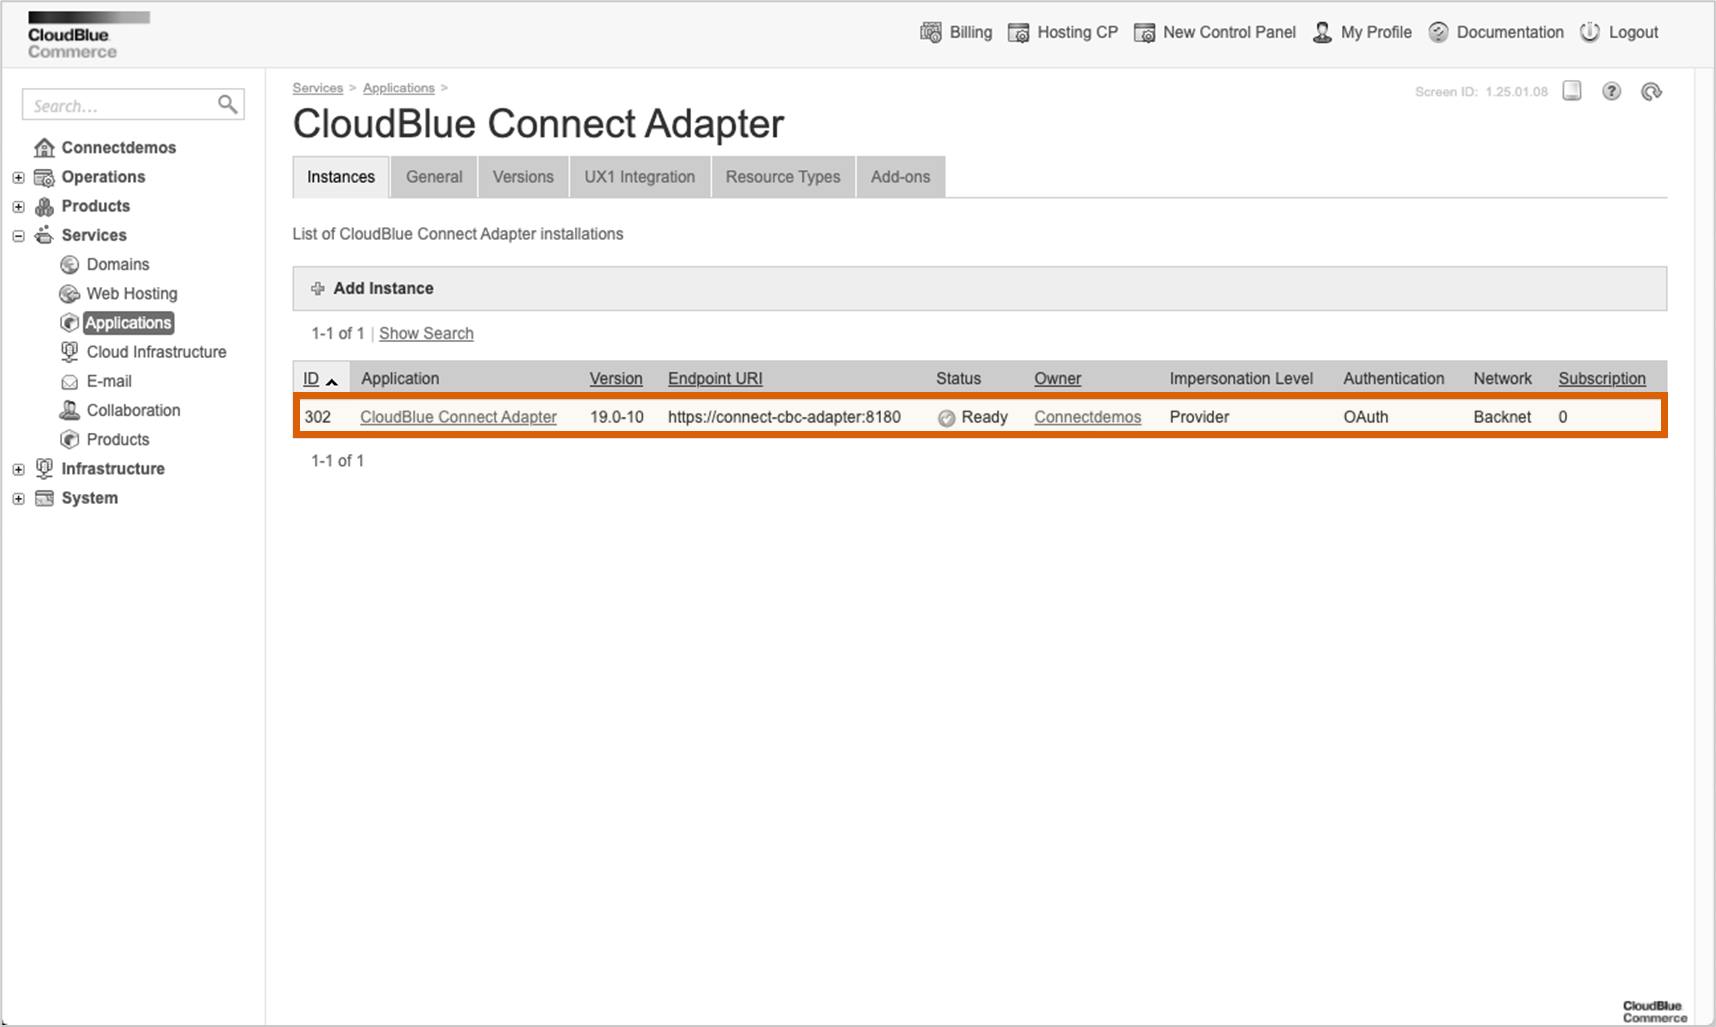
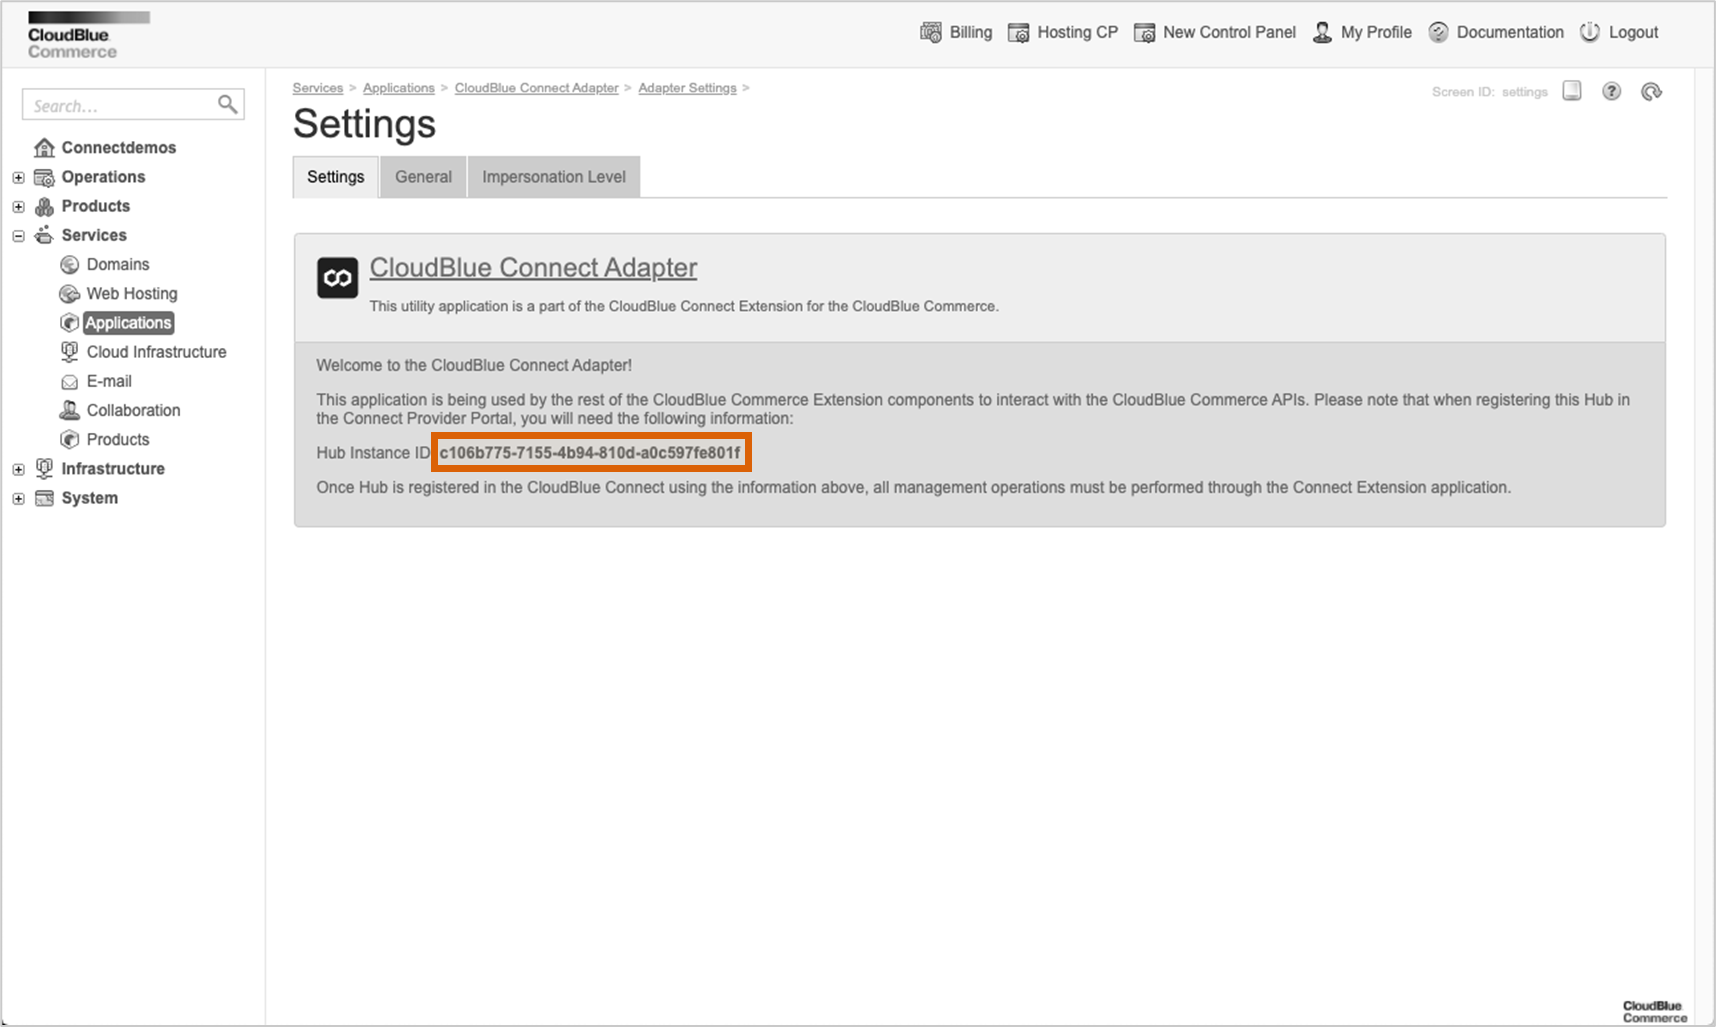
Access the Adapter Package screen to retrieve your Hub Instance ID. This identifier is required to initialize Hub object and establish API connectivity with the CloudBlue Connect.
Once both Adapter Service and Adapter Package are deployed, you will be able to instantiate Hub object referring to this instance of the CloudBlue Commerce in the Provider Portal of the CloudBlue Connect.
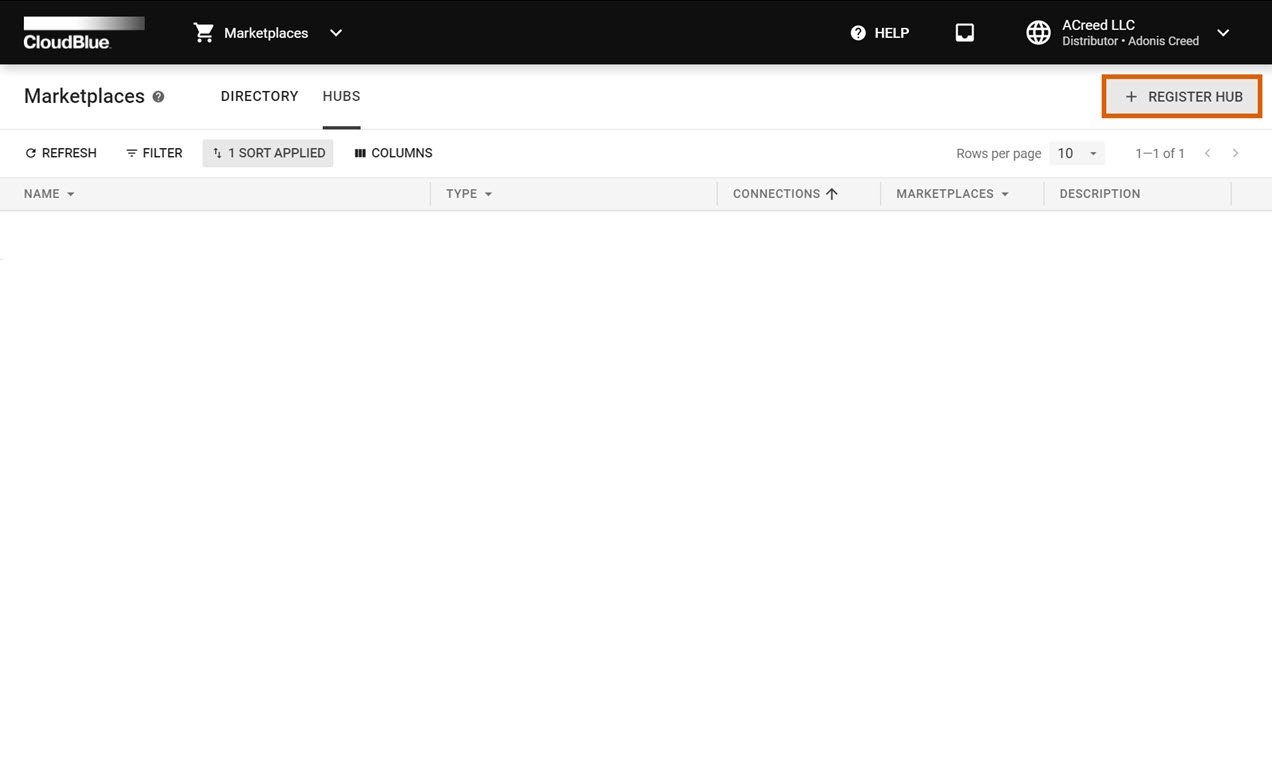
To do that, please navigate to the Hubs section of the Marketplace module and click Register Hub:
Choose Type “CloudBlue Commerce and use Instance ID acquired during creation of the Adapter APS Application Instance in the previous step of this tutorial:

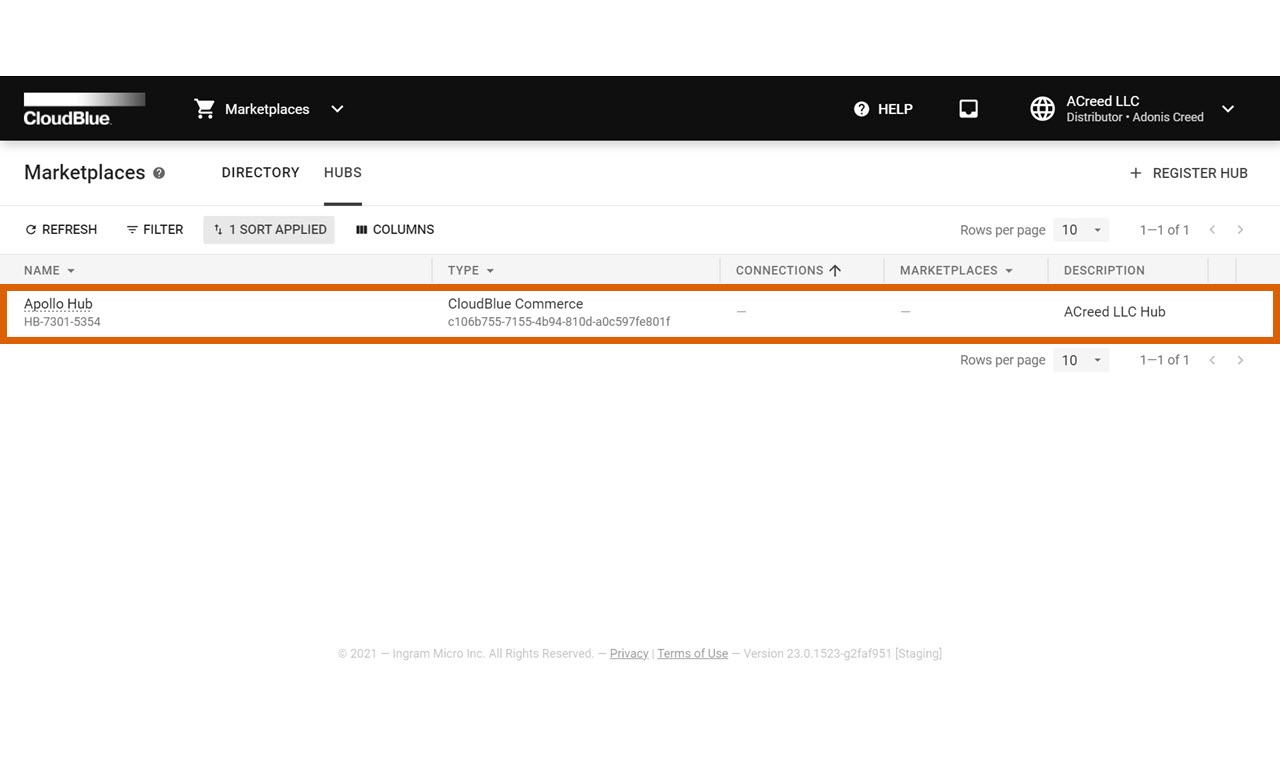
Once registered, you should be able to see the Hub in the list:
Therefore, the Adapter will be successfully configured.
 Additional content
  Contact us
