In order to successfully deploy the AppDirect extension, it is required to provide your Connect data to the extension, configure your AppDirect product, and provide your product parameters and credential data to the extension.
The following outlines prerequisites and showcases how to perform all necessary configurations to implement the integration:
Product Model Preparation
First of all, it is required to determine the product model that it is necessary to publish on AppDirect. This model can vary depending on your marketing and sale strategy. Nevertheless, it is generally required to prepare the following data:
Provider Account ID: Represents your Distributor account identifier on Connect (e.g., PA-123-456).
Provider Token: Your Connect API Key/Handle token that should be created for AppDirect.
Contact Information: Your address/contacts or Top Tier ID in case you already have production subscriptions for the hub.
Hub and Marketplace IDs: Identifiers of your Connect Hub and Marketplace that should be created for AppDirect.
Product ID: Identifier for your product on the Connect platform (e.g., PRD-123-456-789).
Connect Items IDs and specifications: Represent identifiers and the type of your items (reservation or pay-as-you-go).
Marketing Materials: Make sure that your marketing ream prepared all required marketing materials for your product.
Price Model: Ensure that your product price model is consolidated with your sales team.
Item Quantity: Provide this specification in case it is applicable for your product.
Unit Type: Specify types for your item unit on the AppDirect platform.
AppDirect Marketplace URL: Prepare a link to your AppDirect Marketplace.
Once your product model is defined and all prerequisites are met, you can start configuring the AppDirect extension.
Extension Configuration
Follow the steps below to initiate the extension configuration:
Create an Account instance in the AppDirect extension and specify your Provider Account ID along with your Provider Token.
Create a Hub instance in the extension and specify your Hub and Marketplace IDs along with your AppDirect Marketplace URL.
Generate a random username (should be unique; min. length: 40) and password (min. length: 100; with min one capital character, one small character, one digit, and one special character).
Create a Product instance with Connect Product ID. Make sure that this product is associated with your provided account, hub, and other identifiers.
Create an Item instance for each Product Item with your required ID, AppDirect Unit Type, and included Item Quantity.
Create a Tier Details instance with required Contact Information.
Make sure to save the following output data for further operations:
Integration URL: For example, https://appdirect.{env}/appdirect/products/{product_id}/event/process/
AppDirect Outbound Credentials: Name and password that are generated on step 3
In case all of the aforementioned specifications are provided, it is required to configure your product on AppDirect and then finalize your extension configuration as described below.
AppDirect Product Configuration
Create a new AppDirect Product with your marketing details and other required product data. The following steps contain instructions that showcase how to successfully implement the integration:
1. Specify the parameters on the Manage Pricing page as follows:
Edition Code: Specify your Connect Global Item ID.
Restrictions: Check required restrictions according to your Vendor specifications.
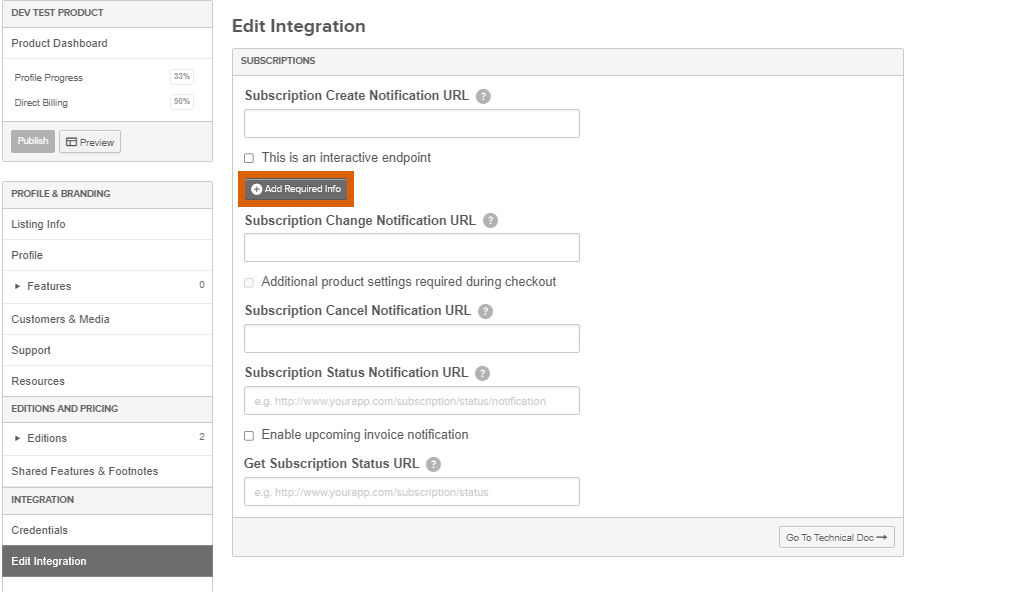
2. Manage the order parameter via the Edit Integrationsection. Namely, click the Add Required Info button to specify required order parameters by using the following form:
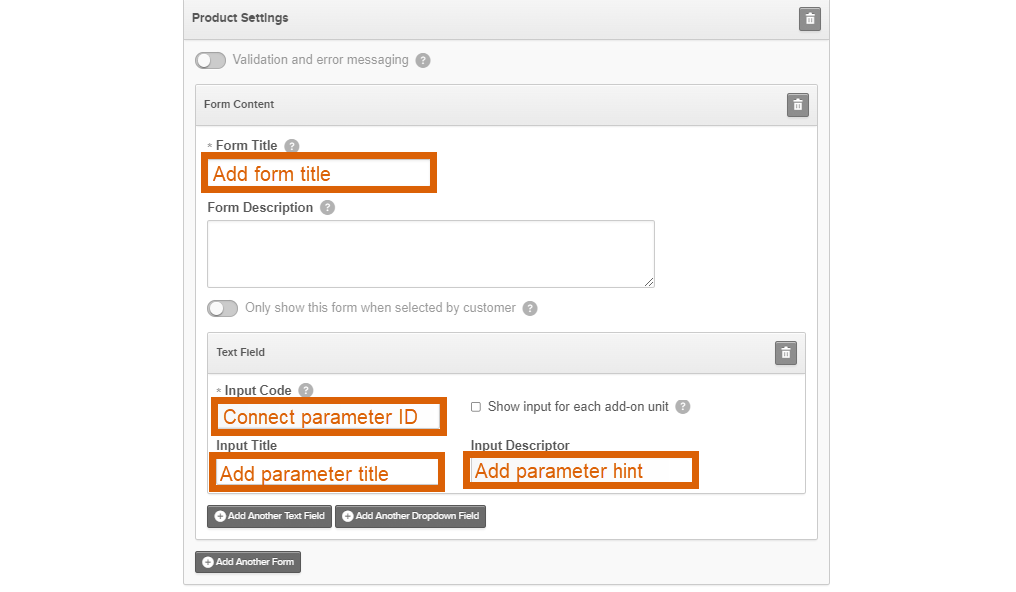
Form Title: Add your form title that is displayed to your customers during the order process.
Input Code: Specify your parameter ID that is displayed on Connect.
Input Title: Provide parameter title that is displayed on Connect.
Input Descriptor: Specify your parameter hint by using this field.
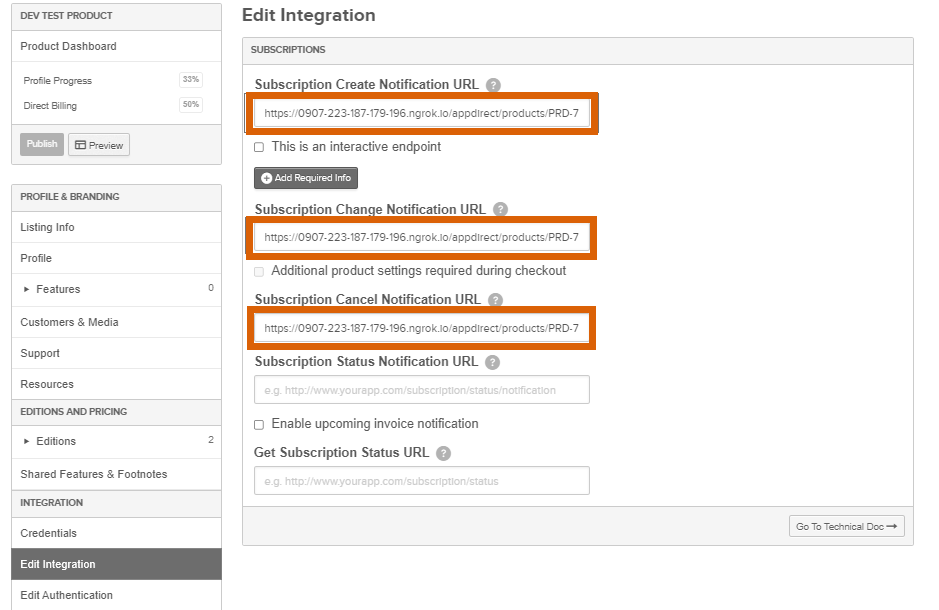
3. Switch back to the Edit Integration section and provide your aforementioned Integration URL. Paste its value as your Subscription Create/Change/Cancel Notification URL:
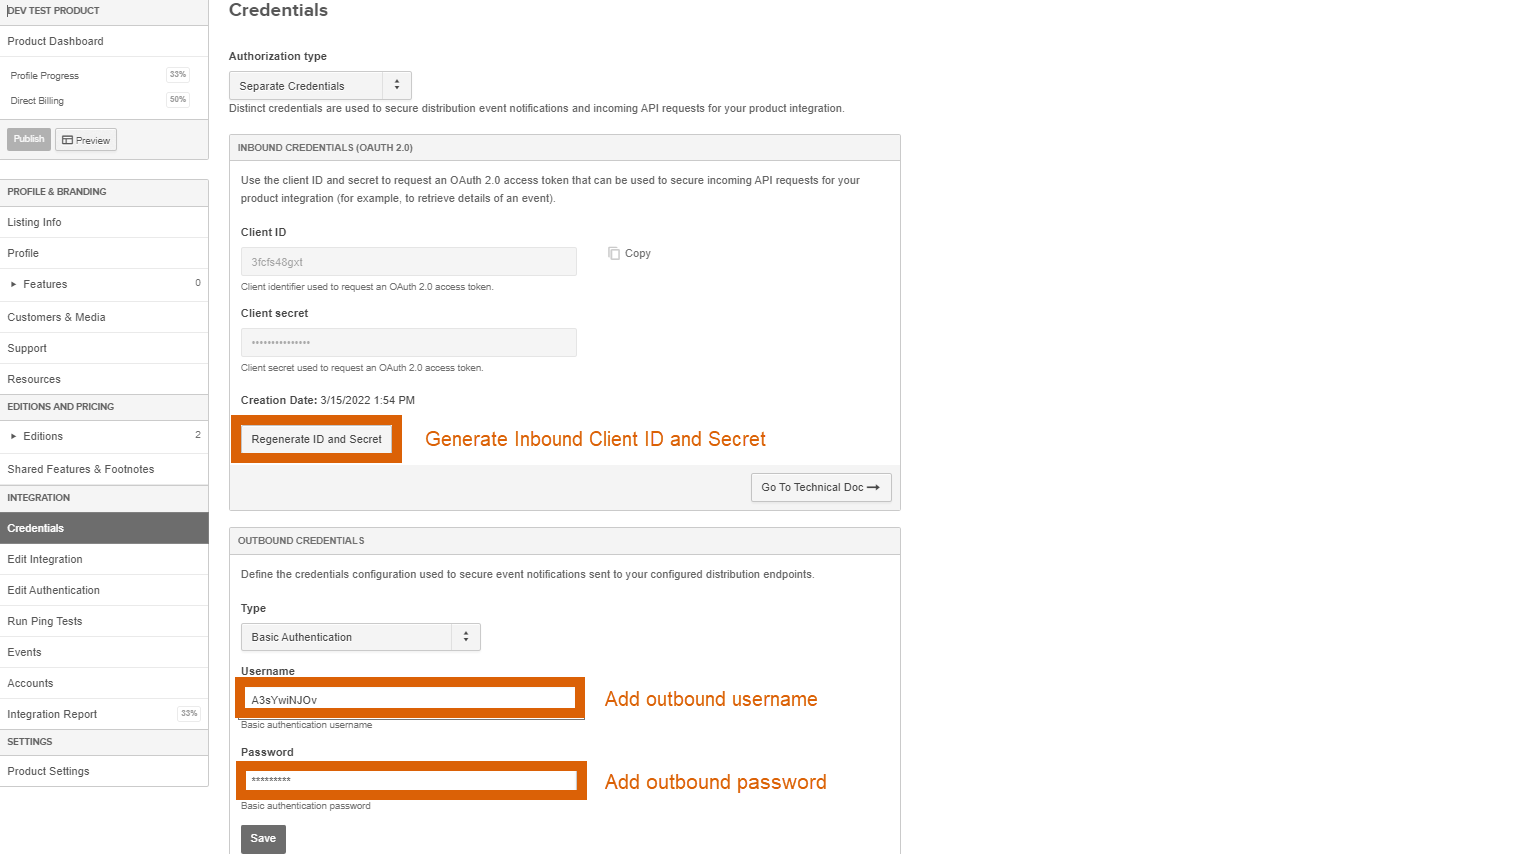
4. Access the Credentials section to start working with your inbound and outbound credentials:
Regenerate ID and Secret: Use this option to create your Inbound Client ID and Secret for inbound API calls.
Username: Type your outbound username that is specified earlier.
Password: Provide your outbound password that is generated with your username.
Make sure to save the following output data for further operations:
AppDirect Inbound Client ID and Secret
AppDirect Product ID
Updating Extension Configuration
Once your AppDirect product configuration is completed, provide the following values to the AppDirect extension:
Client ID & Secret: Update your Product instance created during the Extension Configuration with your previously generated Inbound Client ID and Secret.
AppDirect Product ID: Update your Product instance created during the Extension Configuration with your Product ID from AppDirect.
As a result, your extension configuration will be successfully finalized. It is possible to test out your integration via the Integration Events tab on the AppDirect platform.


 Additional content
  Contact us
