
Zuora represents a comprehensive cloud-based subscription management platform that help organizations administer the subscription lifecycle of their customers. Zuora combines subscription commerce, billing and financing solutions in a single package. General Zuora capabilities include:
The following provides instructions on how to integrate Zuora to the CloudBlue Connect platform via the Workato automation system.
It is important to note that the integration with the Zuora platform includes a set of rules and limitations that are described below:
Sign into your Zuora account and follow the provided instructions to perform configurations that are required for the following operations on the Workato platform.
Custom fields allow storing additional information on many objects in Zuora. Custom fields are also essential for working with Zuora API. Add a new custom field on the Zuora platform as follows:
Navigate to Settings > Billing > Manage Custom fields and then select your required field model. Thereafter, click Add New Field within the Indexed Fields section. Therefore, by using the following configuration forms, set up Data type, Label, API name, and Picklist values (in case the Picklist data type is selected).
The following provides a list of custom fields that are required for working with the CloudBlue Connect platform. The following also contains required attributes for each custom field:
Create the custom fields on the Zuora platform to work with the subscription requests on the Connect platform. It is necessary to specify required valued as described below:
1. Connect Inquiry Link
2. Connect Status
3. Connect Last Order
4. Connect External UID
5. Connect Error Message
6. Connect Activation Link
7. Connect Marketplace
The following custom field allows working with products on the CloudBlue Connect platform:
1. Connect Product ID
A product rate plan is the part of a product that your customers subscribe to. Namely, this custom field allows working with product items on the CloudBlue Connect platform.
1. Connect Product Item ID
The Account Field, as the name implies, allows working with accounts on the CloudBlue Connect platform.
1. Connect External UID
Once required custom fields are defined, it is necessary to map your Connect products on the Zuora platform. There are two scenarios for mapping your Connect products to the Zuora platform depending on the number of item types. Both scenarios are described below:
A) Connect product features a single item type
The following provides instructions on how to map a Connect product with a single item type to the Zuora subscription management platform:
B) Connect product features multiple items
Mapping a Connect product that features multiple item types requires you to create multiple Zuora products that includes the same Connect Product ID and corresponding Connect Item IDs. Namely, it is required to map your Connect product with multiple item types to Zuora as follows:
The Zuora platform features a uniform custom data service for managing your custom objects. These custom objects can be used to extend the data model to accommodate your specific use cases. Configure the following custom objects on the Zuora platform that should represent the CloudBlue Connect objects.
Navigate through Platform > Custom object and click the Create button to start creating Connect objects. Thereafter, enter the required values for your new custom objects as follows:
1. Fulfillment Request
2. Subscription Number
3. Message
4. Inquiry Link
5. Order Number
6. Status
Setting up subscription activation dates is required to enable the functionality to schedule the processing of new and updated subscriptions for Vendors on the CloudBlue Connect platform. Therefore, the Zuora platform will automatically activate subscriptions on your specified time and date and pass required subscription data to the Workato system and consequently generate fulfillment requests on Connect.
Enable this functionality on the Zuora platform by navigating through Settings > Billing > Define Default Subscription and Order Settings. Thereafter, enable this feature by using the Require Service Activation of Orders option.
Note that you can use the Require Customer Acceptance of Orders option in case you must enter a customer acceptance date to activate a subscription. The customer acceptance date is the date on which the customer accepts the services or products within a subscription. Refer to the Zuora Integration for more details.
Orders are generated on the Zuora platform once customers acquire product and establish contractual relationship with merchants. Zuora provides two statuses for order objects: Pending and Completed. Therefore, pending orders can be created by the following order actions:
In case subscription activation dates are specified, pending orders are created via the create subscription actions. Note that to use add product, remove product, and update product actions, it is required to contact Zuora Support and ask the support to enable limited availability for pending orders.
Other actions that are associated with pending orders (i.e., cancel, suspend, resume) are currently not supported. Such actions are saved immediately and without waiting for the approval from the CloudBlue Connect platform.
Creating your OAuth client on the Zuora platform is required to successfully provide your Zuora credentials and integrate this platform to the Workato system. Follow the steps below to generate the required Zuora credentials:
Upon the successful creation, the Client ID and Client Secret values appears on the screen. Save the Client ID, Client Name and Client Secret values for the Zuora credentials configuration on the Workato platform.
Once the Zuora configuration is finalized, it is necessary to use generated credentials to successfully configure the Zuora connector on Workato. Therefore, the Zuora platform will be integrated to the Workato system. The following showcases how to locate and configure required application connector on Workato.
Access your created Workato project and proceed to the Connections section. Click the Create Connection button and search for the Zuora connector. Once the Zuora connector is selected, it is required to fill out the provided Connect to Zuora form as follows:
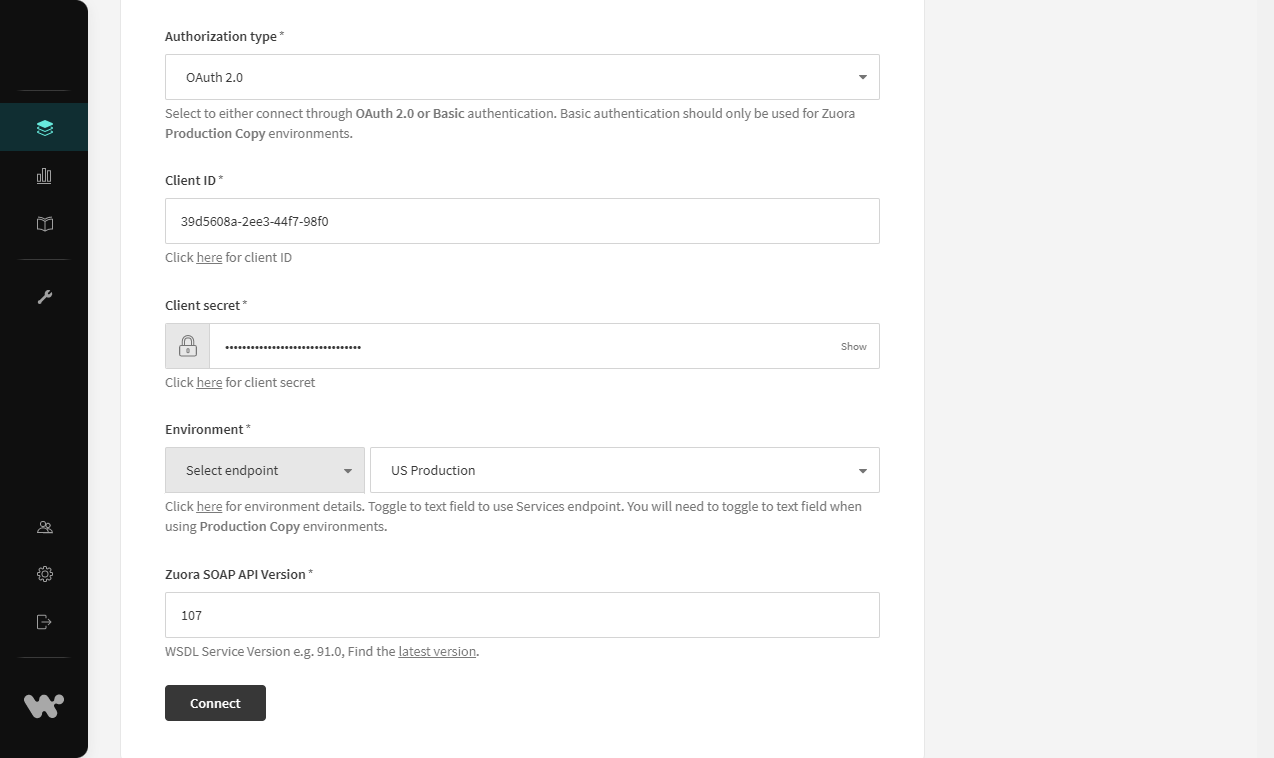
As a result, the Zuora application connector will be successfully configured. Click the Connect button to launch your configured connector.
The HTTP connector configuration is required to establish connection with the Zuora API and to successfully integrate the Zuora platform with CloudBlue Connect. Access the Connections section from your Workato project and start configuring your Zuora HTTP connector as follows:
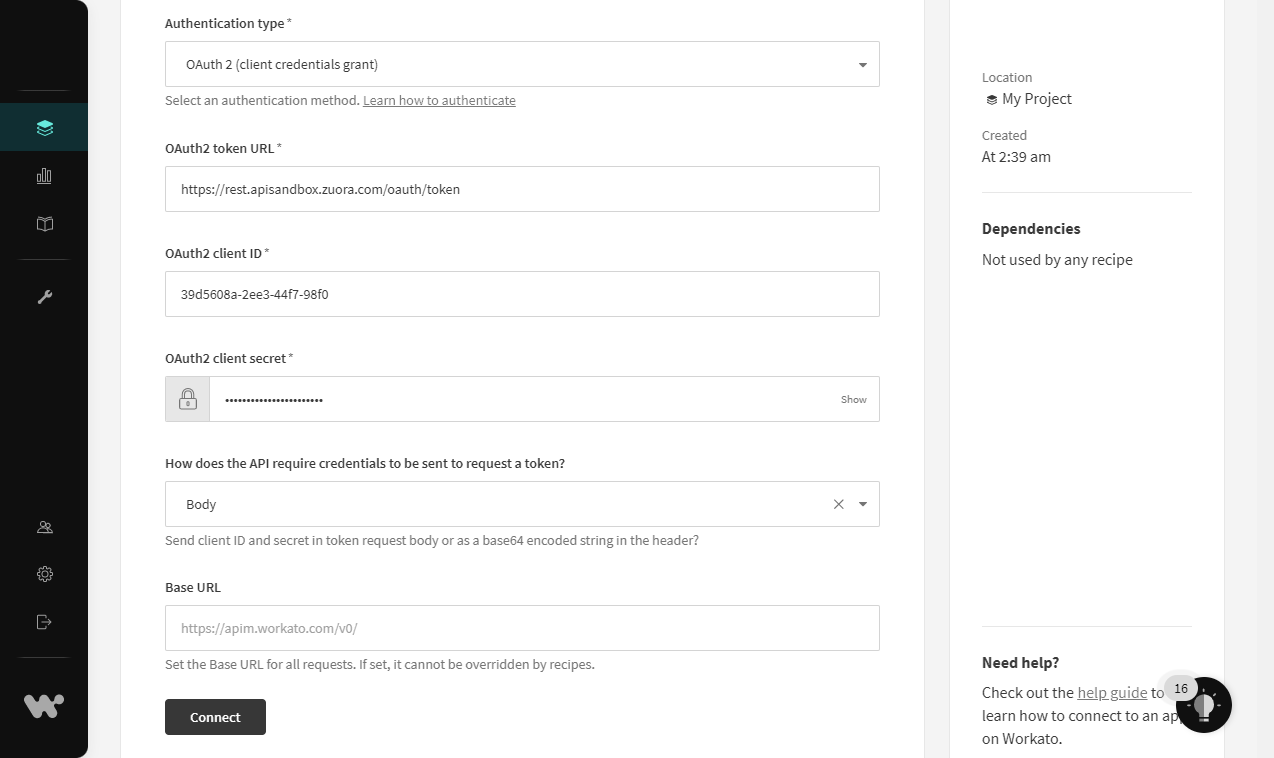
Click the Connect button once the Zuora HTTP Connector configuration is finalized. Therefore, the Workato system allows launching the provided recipes and test out the connection as described below.
Once your Zuora connector and HTTP connectors are configured successfully, you can activate the imported recipes and consequently test out your implemented integrations. Activate the imported recipes as follows:
Access your Workato project and navigate through the Recipes section. Click on the ellipsis icon next to your selected recipe and select the Start option to activate it. It is required to activate the following main recipes:
Note that once the aforementioned recipes are activated and you start to work with the Zuora platform and CloudBlue Connect, other recipes should be launched automatically by the Workato system.
 Additional content
  Contact us
