
Anypoint Studio is Mulesoft’s Eclipse-based integration development environment that is used for designing and testing your Applications.
Anypoint Studio provides the following features for building your Applications:
Before following the provided instructions make sure to install Anypoint Studio and deploy the Connector.
Anypoint Studio helps you design and edit your application via the Mule configuration editor, API definitions, properties and APIs, and the pom.xml file that handles dependencies.
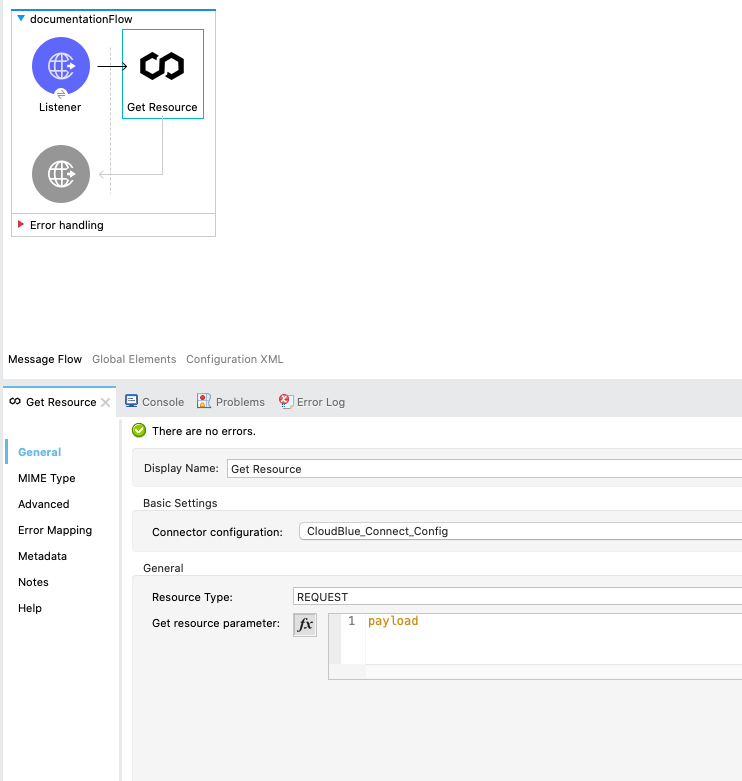
The Mule configuration editor is opened once you double-click on the application XML file via the following path: /src/main/mule/. This editor provides a graphical user interface that allow designing and configuring your application.
The editor contains a canvas that provides users with visual representations of their selected flows. The editor also allows adding required event processors to the canvas as described below:

Therefore, you will successfully add your selected processors to your flow.
Specify Global Element Properties for the CloudBlue Connect Config as follows:
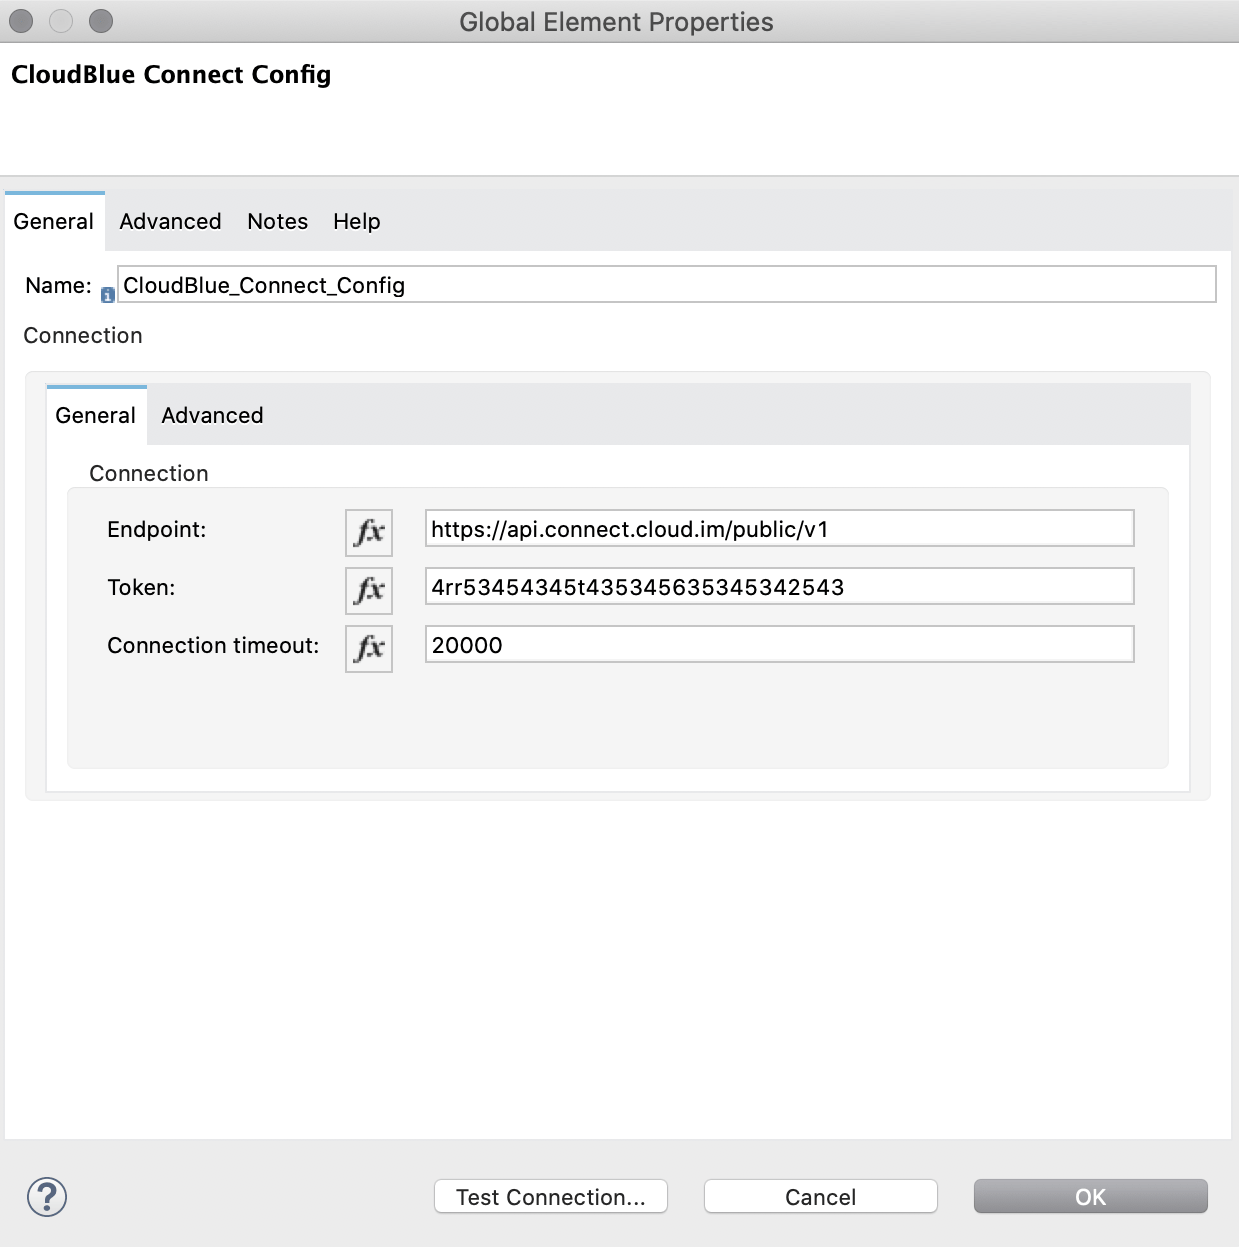
Click Test Connection to test your specified connection properties. Click OK to save your adjustments.
Depending on your selected operation, it is necessary to configure specific input data. This includes filters, product IDs, and so on.
Once all required input data is specified and your application is complete, you can convert your project to a deployable archive and deploy your application as described below.
Convert your designed application to a JAR package by using a wizard provided by Anypoint Studio. Therefore, your created package can be deployed to on-premisis infrastructure or to Anypoint CloudHub.
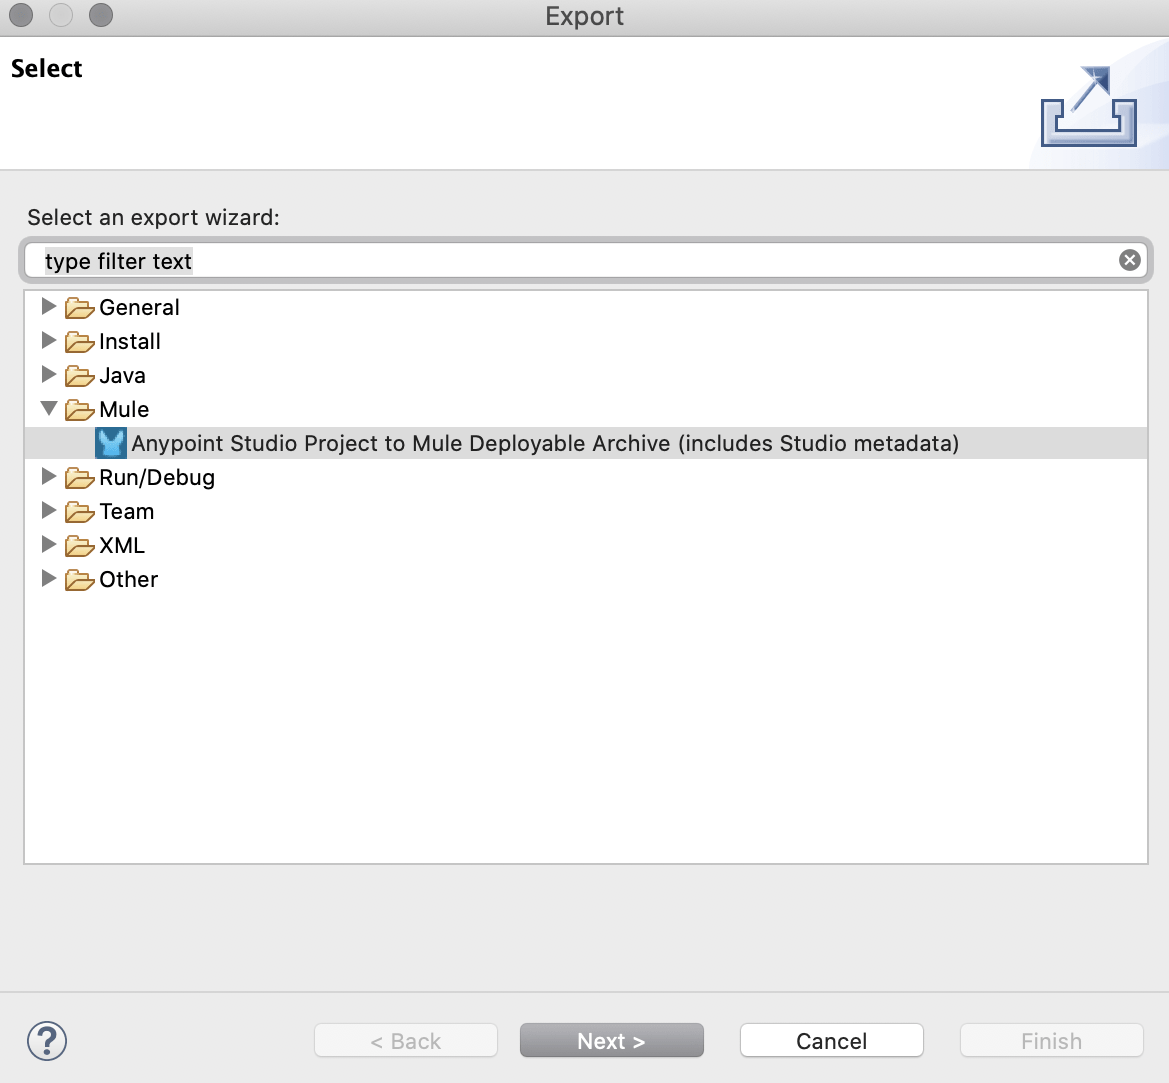
Note that you can choose Attach Project Sources to include metadata that Studio requires to reimport the deployable file as an open Mule project into your workspace.
The following steps showcase how to deploy your mule deployable archive to Anypoint CloudHub:
Thus, Anypoint Studio uses your package name as the name for your application on CloudHub. This name is part of the domain of your deployed application. For example, naming your application “deployment-1” makes your application’s public domain “deployment-1.cloudhub.io”.
You can also configure the runtime version. By default, Anypoint Studio uses the application version that you are using in your project during development. To reduce compatibility risks, you should always deploy to the runtime version in which your Mule project is created or the closest alternative. In addition, you can configure the amount of worker and worker size for the CloudHub instance you are going to use, enable Insight, static IPs, configure log levels, and properties placeholders for your application.
 Additional content
  Contact us
